
Here's the scene every parent knows. You're at school pickup when a teacher stops you and says, quietly: "We found this in the lost-and-found. We think it might be yours." She's holding a jacket. A perfectly nice jacket that just appeared in a pile of other perfectly nice jackets with no name on any of them. You take it and spend the whole drive home calculating whether it's actually yours or whether you've accidentally taken someone else's child's jacket. It looks like yours. But so does every other $40 zip-up fleece in that school.
Clothing labels are the solution to this specific, entirely avoidable panic — and the reason most of them fail is that parents choose the wrong type for the wrong garment. Iron-on on a fleece jacket that should have had a stick-on. Stick-on pressed directly onto the clothing instead of the care tag. Labels that looked fine on day one and were gone by wash three. This guide ends that. Here's the complete picture: which type goes where, why it matters, and how to get it right the first time across every garment, every situation.
From the founder of Sticky Monkey Labels
I'm Dodie King — mom of three boys, two with food allergies and one with sensory sensitivities, original creator of Peel 'n Stix® clothing labels, and founder of Sticky Monkey Labels, now in my 15th year. I have tested every combination of label and garment across three kids in school and daycare simultaneously. The iron-on vs stick-on question is the one I get more than almost any other. Here is the real answer.
Jump to Section
- Why clothing labels fail — the 3 reasons
- Iron-on clothing labels
- Stick-on clothing labels (Peel 'n Stix®)
- Initial dot labels
- Iron-on vs stick-on by garment type
- Placement guide for every item
- School, daycare, and camp
- Sensory-sensitive children and allergy labeling
- Hand-me-downs and removability
- Building a labeling routine
Why Clothing Labels Fail — The 3 Reasons
Clothing labels fail for three reasons, and understanding them tells you everything you need to know about which type to choose.
1. Wrong label type for the garment
Iron-on labels need heat and smooth surface contact to cure. Applied to fleece, puffer fill, or water-resistant treated material, the heat doesn't penetrate correctly and the label doesn't fully bond. It looks fine, survives one or two washes, then starts peeling from the edges. The label wasn't a failure. It was the wrong tool for that garment.
2. Stick-on applied to fabric instead of the care tag
Stick-on clothing labels belong on the care tag inside the garment — not on the clothing. The material stretches and flexes during wear and washing in ways that break adhesive contact. A stick-on pressed directly to the garment will peel before the end of the first school week. The same label on the care tag? It survives the full year.
3. Washing before the cure window closes
Both iron-on and stick-on clothing labels need 24 hours to set before the first wash. Iron-on needs 24 hours for the thermobond to fully cure. Stick-on needs 24 hours for the pressure-sensitive adhesive to fully bond to the care tag. Wash within that window and you're washing a label that hasn't finished bonding. Every label that "peeled after the first wash" was almost certainly washed within 24 hours of application.
Iron-On Clothing Labels — Soft, Seamless, Permanent
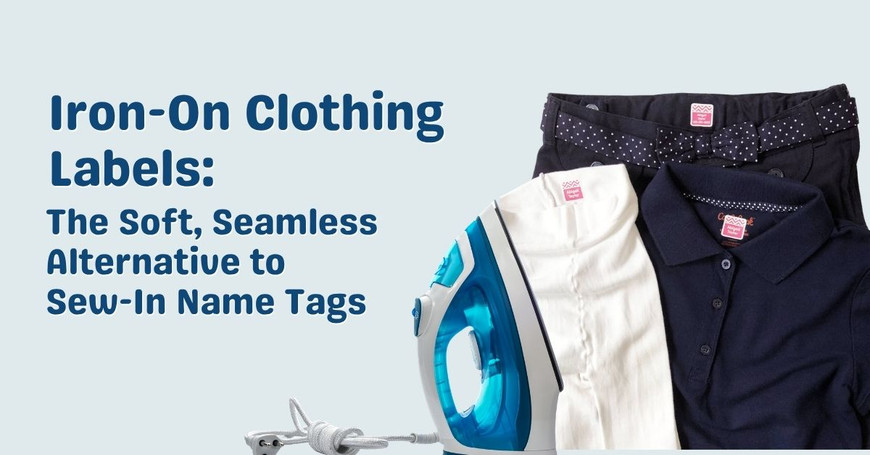
Iron-on clothing labels use thermobond technology: heat activates the adhesive and permanently bonds the label to the garment. When done correctly on the right garment, the label becomes part of the garment — it isn't just sitting on the surface, it has bonded to it permanently. This is what makes iron-on labels genuinely permanent and what makes them completely flat against the skin with no raised edges, no corners, and no texture difference a sensory-sensitive child can feel.
What iron-on clothing labels survive: Regular machine washing on any cycle. Tumble drying. Outdoor wear and physical activity. Years of repeated washing — properly applied iron-on labels on cotton garments routinely survive from kindergarten through the end of elementary school without fading or lifting.
How to apply iron-on clothing labels correctly:
- Pre-heat the garment area with the iron for 10 seconds — warm, dry fabric bonds better than cold
- Position the label on the inside back collar or waistband area
- Cover with a thin pressing cloth or parchment paper — never iron directly on the label surface
- Press with cotton setting, no steam, firm even pressure for 60–90 seconds — press-and-lift, do not slide
- Flip the garment and press from the other side for 30 seconds — this sets the bond into both surfaces
- Let cool completely, then confirm all edges are firmly adhered
- Wait 24 hours before the first wash
Where iron-on labels work: Cotton and cotton-blend garments — onesies, rompers, polo shirts, school trousers, sweatshirts, cotton dresses, school uniforms. If the care label says "cotton setting iron safe," iron-on works. Browse our iron-on clothing labels — sized to fit inside collars and waistband areas without showing when worn.
Stick-On Clothing Labels (Peel 'n Stix®) — Flexible and Removable
Our original Peel 'n Stix® stick-on clothing labels use a pressure-sensitive adhesive engineered specifically for the smooth woven surface of a sewn-in care tag — not for the garment surface. Peel the label, press firmly to the care tag, and the adhesive cures against that stable woven surface. The result is a label that survives machine washing because it's bonded to a surface that doesn't stretch or flex the way the garment material does.
This is the detail that matters most: parents who put stick-on labels directly on clothing and find they peel aren't finding a product failure. They're finding the right product applied to the wrong surface.
What stick-on labels survive: Regular machine washing on care tags through a full school year. Tumble drying. Repeated wear and handling. And unlike iron-on, they can be cleanly removed from the care tag when clothing passes to a younger sibling — making them the right choice for any garment you plan to hand down.
How to apply stick-on clothing labels correctly:
- Find the care tag — the flat woven tag inside the collar or waistband
- Wipe the care tag with a dry cloth to remove any lint
- Peel the label without touching the adhesive surface
- Position fully within the flat face of the tag — no part of the label should extend onto the raw garment
- Press firmly from center outward
- Run a thumbnail along every edge for full contact
- Wait 24 hours before the first wash
Where stick-on labels work: Any garment with a care tag, on any garment type — fleece, puffer, waterproof outerwear, synthetic blends, sportswear, non-iron-safe garmentss. Also the right choice for garments you'll hand down. Browse our Peel 'n Stix® stick-on clothing labels.
Initial Dot Labels — For Multi-Child Families and Older Kids
For families with multiple children, small circular labels with each child's initials (one color per child) offer a discreet way to sort laundry and identify clothing at a glance. For older students who don't want a full name label on their hoodie, initial dots are discreet enough to not look childish while still solving the lost-item problem.
Initial dot labels are best for:
- Sorting laundry among siblings — one color per child, sorted visually at a glance
- Socks and underwear where full-name labels feel like overkill
- Older students who want discreet identification on high-value items
- Quick visual identification in drawers and cubbies
Iron-On vs Stick-On by Garment Type — The Complete Guide
| Garment | Label Type | Why |
|---|---|---|
| Cotton school uniforms, polo shirts, trousers | Iron-on ✅ | Cotton is the ideal iron-on surface — survives multiple washes per week all year |
| Cotton-blend sweatshirts and hoodies | Iron-on ✅ | Sweatshirt material takes iron-on well — same cotton setting, pressing cloth if in doubt |
| Cotton onesies and baby garments | Iron-on ✅ | 100% cotton, bonds cleanly into inner collar without stiffness against baby's skin |
| Fleece jackets and zip-ups | Stick-on on care tag ✅ / Iron-on ❌ | Fleece is not iron-safe and the loose texture prevents full adhesive contact during pressing |
| Puffer coats and waterproof jackets | Stick-on on care tag ✅ / Iron-on ❌ | Waterproof coatings block heat penetration; puffer fill flattens under iron |
| PE kit and synthetic athletic fabrics | Check care label first ⚠️ | "Do not iron" or "cool iron only" → stick-on on care tag. Cotton performance material → iron-on fine |
| Sleep sacks and comfort blankets | Stick-on on care tag ✅ | No consistent flat surface for iron-on; care tag is the right application point |
| Socks | Iron-on ✅ | No care tag; iron-on inside the cuff handles the high-friction sock environment |
Placement Guide for Every Item
Where you put the label matters as much as which type you choose. Labels in hard-to-find spots don't get found by teachers or daycare providers trying to return your child's belongings.
Shirts and tops
Inside back collar or care tag. Visible immediately when a shirt is picked up or turned inside out.
Pants and shorts
Inside waistband at the back center, or on the care tag. Waistband placement survives more wash cycles than side seam placement.
Jackets and coats — most important
Double-label: inside collar AND inside pocket. Jackets are the most commonly lost school item. A label in both places means it comes home regardless of how the jacket is picked up and handled.
Socks
Iron-on inside the cuff of each sock. Initial dot labels work well here for multi-sibling households — one color per child.
Shoes
Inner sole at the heel — the most stable flat surface, most visible when the shoe is picked up. Our shoe labels are waterproof and survive the shoe environment. For younger children, MatchUP shoe labels form a complete picture only when shoes are on the correct feet, teaching left from right alongside identification.
Backpacks and bags
Two labels, not one: exterior name label in a visible location, plus a contact label (name and phone number) inside the main compartment. The exterior label helps return the bag quickly. The interior contact label helps reach the parent directly.
School, Daycare, and Camp
School: Iron-on on every cotton or cotton-blend uniform piece. These wash multiple times per week and iron-on is the only label that survives that frequency without fading or lifting over a full school year. Stick-on on the care tag of every jacket and fleece. PE kit: check the care label first — most synthetic PE kit needs stick-on. The spare outfit stored at school needs every garment labeled — these come off the child after accidents and need a name on every single piece to find their way back. For the complete back-to-school labeling checklist, see our back to school labels by grade complete checklist.
Daycare: Same iron-on vs stick-on rules apply with one addition: label the spare outfit bag stored in the cubby, not just the garments inside it. Daycare staff need to find the right bag quickly. For a complete guide to everything that needs a label at daycare, see our complete daycare labeling guide.
Camp: Use iron-on labels for all clothing that goes through communal laundry — the permanent bond is essential when clothing is washed in bulk with dozens of other campers' items. Use stick-on labels for gear, containers, and equipment. Label every single item before drop-off, including things that seem unlikely to get lost. At overnight camp, everything eventually enters communal areas. Create a packing list with a checkbox next to each item and check it off as you label and pack — this ensures nothing goes unlabeled.
Sensory-Sensitive Children and Allergy Labeling
Sensory sensitivities: Iron-on labels are the right choice for children who are sensitive to textures. When correctly applied, they bond completely flat with no raised edge, no corner, and no texture difference a child can feel through the garment. My own son cannot stand tags and asks me to cut them out of everything — iron-on labels solve this entirely. For items worn close to the body, iron-on is the sensory-safe option.
Allergy and medical labeling: For children with food allergies, medical conditions, or special needs, clothing labels carry stakes beyond organization. Including a parent phone number on jacket and backpack labels means anyone who finds your child can reach you immediately without relying on the child to communicate that information. Our allergy labels and medical alert labels apply alongside name labels on lunchboxes, backpacks, and food containers — communicating dietary restrictions and medical conditions to any adult at point of contact, regardless of who is supervising that day. For the complete allergy labeling guide, see our allergy and medical alert labels guide.
Hand-Me-Downs and Removability
Iron-on labels are permanent by design — the thermobond adheres permanently and removing it damages the garment. If you plan to hand down school uniforms, PE kit, or other labeled garments, stick-on labels on care tags are the right choice — they peel cleanly off the care tag when it's time, leaving the garment in handover condition.
The practical approach for a wardrobe that will span multiple children: iron-on on garments that will stay with this child for their full school career, stick-on on anything you expect to pass down before it wears out. Both options are available across all our designs so each sibling can have their own name and their own chosen design.
Building a Labeling Routine That Actually Sticks
The families who get the most value from clothing labels make labeling a system, not a one-time event before school starts and never again.
- Take inventory first. List every item that leaves the house regularly — clothing, shoes, bags, seasonal gear, sports equipment.
- Choose label types based on the inventory. Iron-on for cotton and hot-wash items. Stick-on for care tags, jackets, hand-me-downs. Initial dots for sibling sorting.
- Order in June or July. Back-to-school label orders spike in August. Iron-on labels need 24 hours to cure before the first wash. Ordering early means labeling in July with the time to do it properly, not the night before the first day.
- Label in one session. Start with high-value items (jackets, shoes, bags), move to frequently lost items, then everyday clothing. One session, everything done.
- Label new items immediately. When something new arrives, it gets labeled before it leaves the house. Keep a few labels in a drawer so this is a two-minute task, not a project.
Let kids choose their design. Children who participate in labeling are more likely to look for their label when checking whether something is theirs, and more likely to take care of labeled items because they feel ownership over them. Pre-readers benefit especially — a child who can't yet read their name can identify "the one with the purple dinosaur" from across a daycare room. Browse our iron-on clothing labels and Peel 'n Stix® stick-on clothing labels. For stick-on clothing labels specifically applied to clothing care tags, see our dedicated stick-on clothing labels guide. Questions? Call us at 1-888-780-7734.
About the Author